If you want to be a power user of your Synology Network Attached Storage device, you need to get down and dirty and access the DSM's command line interface, also known as the shell. (DSM is an abbreviation for DiskStation Manager, the operating system for the Synology NAS.) The shell used in the Synology NAS is ash, or the Almquist shell, which is a cutdown version of the more pervasive bash shell that is widely used on Linux systems.
To familiarize yourself with the ash shell, you can first log in to the DSM using the Telnet interface.
If you are using a Windows 10 PC, Telnet is not enabled by default. The most straightfoward way to enable Telnet is described at How to enable the Telnet Client in Windows 10. In the Windows Command Prompt interface, enter the command:
dism /online /Enable-Feature /FeatureName:TelnetClient
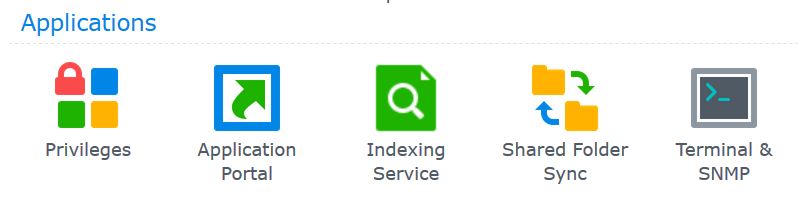
You must also enable the Telnet interface within the DSM. After logging on the the DSM graphical user interface, select the Control Panel icon, then select the Terminal & SNMP icon under Applications:
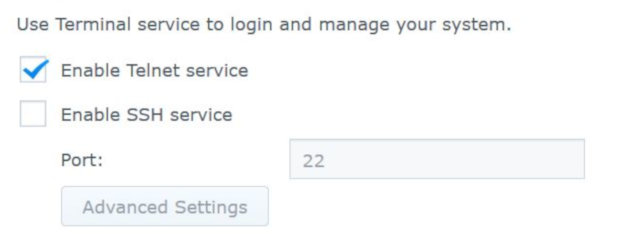
This displays a subpage of Control Panel, containing the Terminal and SNMP tabs. Under the Terminal tab, check the "Enable Telnet service" box (but ignore "Enable SSH service" for now).
Then select "Apply", and exit Control Panel. Now go back the the Windows Command prompt, and type in telnet. You should get the response:
![Welcome to Microsoft Telnet Client; Escape Character is 'CTL+]'; Microsoft Telnet>](image/windows-telnet-prompt.jpg)
Within this Telnet session, enter the command
open username.synology.me
where username.synology.me is the same hostname that you use to logon to the DSM. Telnet should reply with
Diskstation login:
where Diskstation may be replaced by the configured name of your Synology device. If you do not see this, (for instance, if you see a immediate prompt for a password) make sure that port 23 is enabled on your router, and is set up to direct traffic to the Diskstation. Assuming that you do see the prompt, respond with a username, or admin. Telnet replies with:
Password:
to which you should respond with the username's password. Telnet then enters the ash shell, and you can enter ash commands, such as the ls command. To terminate the session, enter the logout command.
However, the Telnet program is nowadays regarded as quite insecure, because none of the data that flows over it, including the logon password, is encrypted. So it is recommended that you replace the Telnet program with SSH, as this article will describe.
SSH is formally specified in RFC4253. It uses a private/public key pair to negotiate a symmetric-key algorithm, which is then used for the bulk transmission of encrypted data.
The recommended Windows program that implements SSH is Putty. It was developed by Simon Tatham and can be downloaded from www.chiark.greenend.org.uk/~sgtatham/putty/. The site putty.org contains a link to this site, but it is not the official distribution site, and is actually owned by a competitor's product. The name of Putty is a bit of a pun, as it was originally designed to fix Windows (but it is now also available for Linux). The TTY is also often capitalized (to recall the teletypewriter acronym, I think).
Putty is actually part of a suite of related programs:
SSH (Secure Shell) is a cryptographic protocol that uses public key encryption. In this form of encryption, data encrypted with a public key can only be decrypted with the private key, and data encrypted with a private key can only be decrypted with the public key. SSH is a client-server protocol in which the server uses a public key and the client uses the corresponding private key. Unlike SSL/TLS, which encapsulates its keys within certificates, SSH simply uses raw keys.
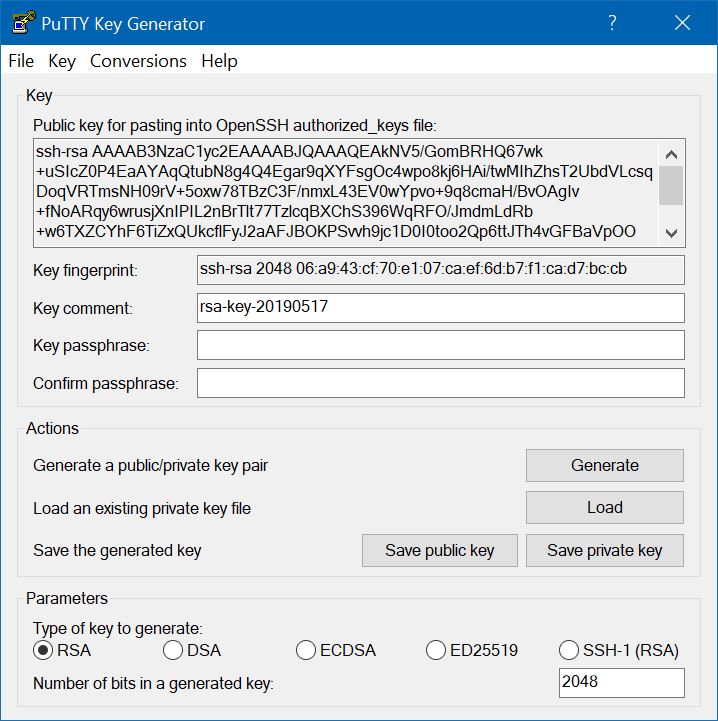
The key pair can be generated by the PuTTYgen program. After you start PuTTYgen, press the Generate button to start the key generation process. To generate randomness in the keypair, move the mouse pointer randomly within the central area of the PuTTYgen window.
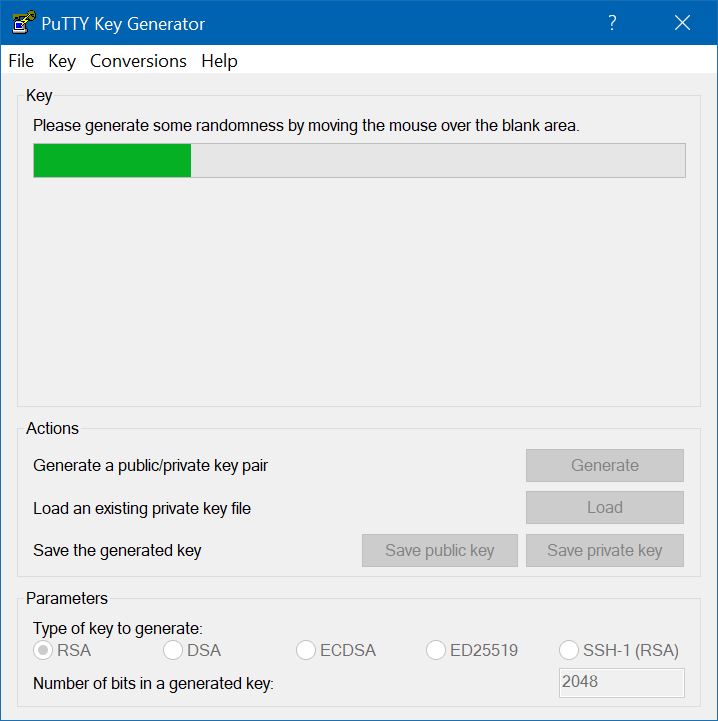
When enough random activity has been performed, the keys are generated. As its name implies, the public key is not a secret, so it is displayed by the program in the box labelled "Public key for pasting into OpenSSH authorized_keys file". It is intended that you use the edit copy function to copy the public key to the clipboard, so that you can store it in a file on the SSH server. You must also save the private key as a file, by pressing the "Save private key" button; but before doing so you should enter – and remember – a passphrase to protect the private key and to keep it secret. The passphrase is used to encrypt the private key. If you try to save the private key without setting a passphrase, you will receve the warning "Are you sure you want to save this key without a passphrase to protect it?", to which you should reply No, and go back to enter the passphrase.
There is a "Save public key" button that can be used to save the public key to a file, but this saves the key in a format that is not useful for SSH. However, the saved private key file also contains a copy of the public key. You can restore the paired public and private keys into the PuTTYgen window by pressing the "Load" button.
Before you can use SSH, the public key generated by PuTTYgen must be installed on the Synology server. The key is stored in a file named authorized_keys, and there is one such file for each user. For the Synology DSM, the location of this file depends on whether the user is a normal user or the superuser root. For normal users, the authorized_keys file is stored in the homes/username/.ssh directory, but since root does not have a homes entry, its authorized_keys file is stored in the /root/.ssh directory. This can be done using the Telnet connection that has already been established.
sudo su
You will be prompted for the admin password, and then switched into superuser (root) mode, which will enable you to add files with root authority. The active directory should already be the root directory: enter the pwd command to confirm this. The command should respond with a single / character. If not, enter the cd / command to reset it.
The key file must be placed in /root/.ssh, so enter the following commands to create and enter that directory and to create the file within it. The directory and file must be marked inaccesible by non-root users and groups:
mkdir root
cd root
mkdir .ssh
chmod 700 .ssh
cd .ssh
touch authorized_keys
chmod 600 authorized_keys
Now, edit the authorized_keys file with the vi editor:
vi authorized_keys
You can now copy the public key from the PuTTYgen panel, and paste it into the vi session using a mouse right-click. This puts vi into insert mode, from which you can escape with the ESC key. Then enter the :x command to save the file and exit. You are now done wih Telnet, so enter exit to exit superuser mode, and then logout to terminate the Telnet session.
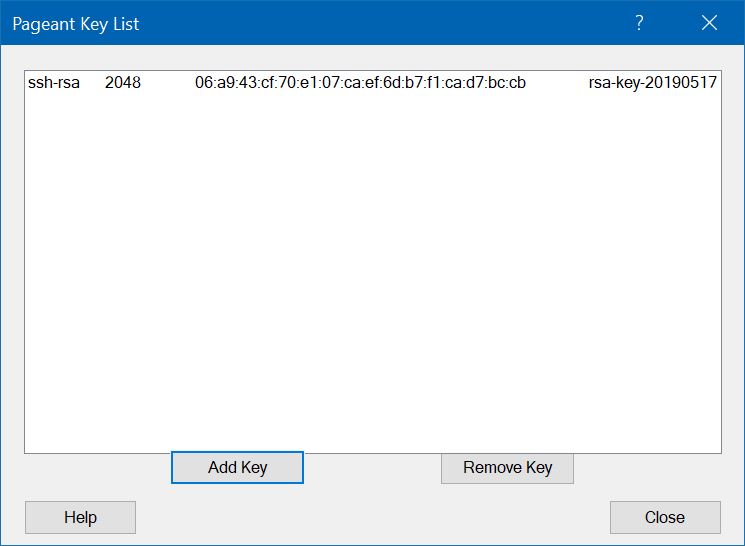
root userYou must now install the private key on your client Windows system, assuming that you have already saved it as a file from PuTTYgen. The Pageant program is used. When you start Pageant, it immediately hides itself in the Windows system tray, so you have to click on its icon there. This brings up the following window:
Press the "Add Key" button. This brings up a file picker menu, in which you select the private key file that you had saved in PuTTYgen. You will be prompted to enter the passphrase that you specified when you saved the file.
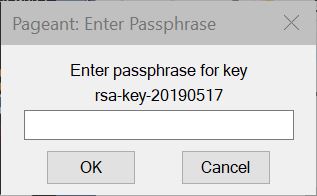
Enter the passphrase and press OK.
The private key is then active, and the Pageant window changes to:
You can now close the Pageant window, but the key will remain active.
You are now ready to activate SSH.
Go back to the DSM Control Panel, and select the
Terminal & SNMP icon again.
This time you should deselect "Enable Telnet service" and select "Enable SSH service".
You should also choose a port number for SSH that is different from the default 22.
This is a dubious security by obscurity
ploy that I am not convinced by,
but the DSM Security Advisor function insists on it.
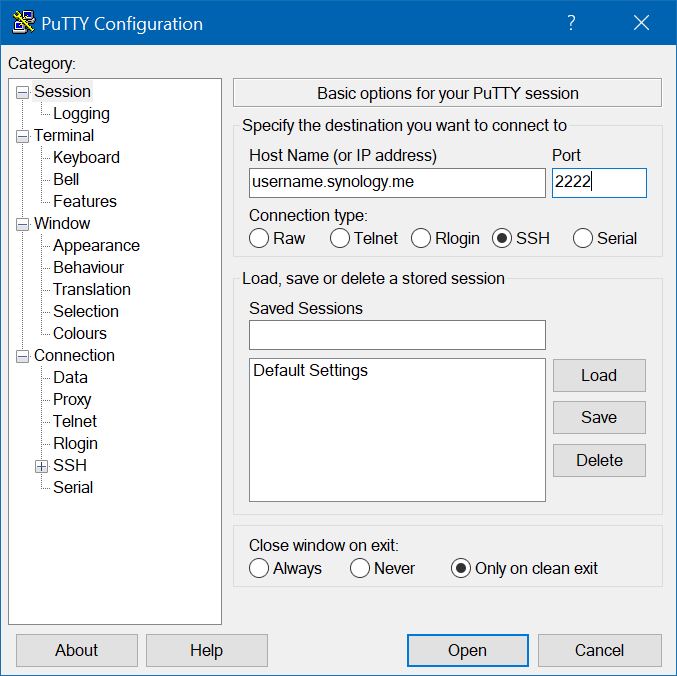
In this example, a port number of 2222 is chosen.
You must also enable this same port number in your router.

You should now be able to logon to the DSM over SSH using PuTTY. Enter your DSM hostname and the selected SSH port number:
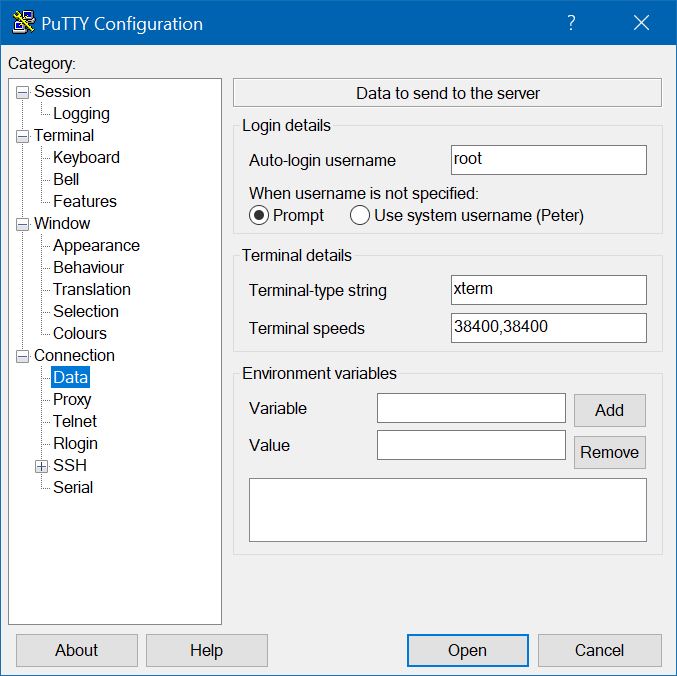
Click on the Data item under Connection, and enter root as the "Auto-login username".
Then press "Open".
Putty opens a secure terminal session beginning with:
Using username "root".
Authenticating with public key "rsa-key-20190517" from agent
Congratulations! You have successfully configured SSH for your Synology NAS.
Notice that you have been logged in without specifying a password. The authentication of your username comes from the private key, so the password is not required.
Now that you have secure access to the DSM, you should consider executing the DSM Security Advisor, to check whether you have left any insecure interfaces active. You should probably also check your router to disable ports 21, 22, and 23 (FTP, Default SSH, and Telnet), as they are no longer needed.
Since you now have SSH access to the DSM, it is not necessary to use Telnet to set up access for other users.
Use PuTTYgen to generate a new key pair, and save the new private key on the Windows file system.
The public keys for non-root users are stored in
homes/user/.ssh/authorized_keys.
On the Synology device, the homes directory is located in the /volume1 directory.
The new .ssh directory and the Then paste the public key information from PuTTYgen into vi,
and save the file as before. Alternatively, the .ssh/authorized_keys structure can be created within the
DSM graphical user interface, by using the File Station application.
cd /volume1/homes/user
mkdir .ssh
chown user:users .ssh
chmod 700 .ssh
cd .ssh
touch authorized_keys
chown user:users authorized_keys
chmod 600 authorized_keys
vi authorized_keys
Copyright © Peter Havercan 2019.
Windows is a registered trademark of the Microsoft Corporation.
Synology is a registered trademark of Synology Inc.